Have you ever wondered how your lungs work? Researchers from our Children’s Lung Health Team show you how to make a simple lung model by using common household items.
Materials –
- 1x plastic cup
- Scissors
- Sticky Tape
- 2x balloons
- 1x straw
Method –

Step 1: Use the scissors to make a hole at the bottom of the plastic cup. This hole will need to be big enough to fit the straw through.
Step 2: Use the scissors to cut the plastic straw in half.
Step 3: Use the scissors to cut the balloon neck tip off the first balloon.

Step 4: For the second balloon, tie a knot in the balloon neck and turn the balloon upside down to cut the wider top section off.
Step 5: Put the straw into the first balloon and seal the opening around the straw with several pieces of tape.
Step 6: Push the straw through the wide section of the cup and into the hole.

Step 7: Pull the straw through the hole until only a small section is showing and seal the top the cup with sticky tape.
Step 8: Take the second balloon with the knot and stretch the open end over the bottom of the cup. Secure the balloon with sticky tape.
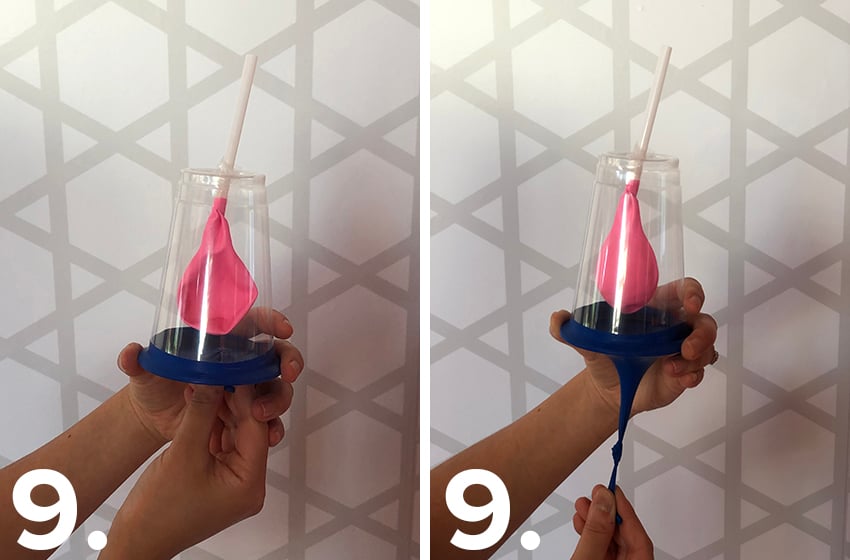
Step 9: Hold the cup and pull the knot of the balloon at the bottom and see your lungs in motion!

Why does this happen?
As the knotted balloon (diaphragm) is pulled it creates more space in the bottle. Air then comes down the straw (trachea) to fill the space and inflates the balloon (lung) taped to the straw. When the knotted balloon is released, the space is decreased, pushing out the air from the balloon and causing it to deflate.

